Explore the magic of images coming to life
Inkjet Lift
The Floating Image
The inkjet emulsion lift method that frees your photographs, so you can lay them onto paper, glass, metal, wood…
Lift.
Crease.
Let it float.
Inkjet Lift
The Floating Image
The inkjet emulsion lift method that frees your photographs, so you can lay them onto paper, glass, metal, wood…
Lift.
Crease.
Let it float.
• APPRENEZ À VOTRE RYTHME
• ACCÈS ILLIMITÉ
LEARN AT YOUR OWN PACE • UNLIMITED ACCESS
The image is no longer just printed.
It becomes matter.
In this workshop, I share inkjet emulsion lift, a technique I started practising more than 15 years ago.
I have broken it down step by step, with simple materials that are easy to find.
Set your images free
Lighter.
More sensory.
More alive.
An image that comes away from its base, ripples, crumples, lets the light through, and carries the trace of the hand that shaped it.
With Inkjet Lift, you no longer simply place an image on a surface.
You lift it.
You sculpt it.
You let it find its own shape.
Watercolor paper, Japanese paper, glass, mirror, metal, ceramic, wood, fabric, gold leaf…
Each surface gives the same image a new character.
An image can be much more than a print. With inkjet emulsion lift, it becomes a veil shaped by your own hands.
Launch Offer
Inkjet Lift
Until November 22
Full access to the workshop
180 €
140 €
Payment 1 x 140 €
or 2 x 71 €
We have never produced and consumed so many images.
Instant, endlessly editable, generated in seconds, perfect but smooth…
And yet many artists and creatives today feel the need to return to something more alive.
For more than twenty years, I have been exploring transfer processes that let images break free from pixels and find a physical, sensitive and deeply embodied presence again.
With Inkjet Lift, the human hand comes back to the heart of the artistic process.
They say it better than I ever could
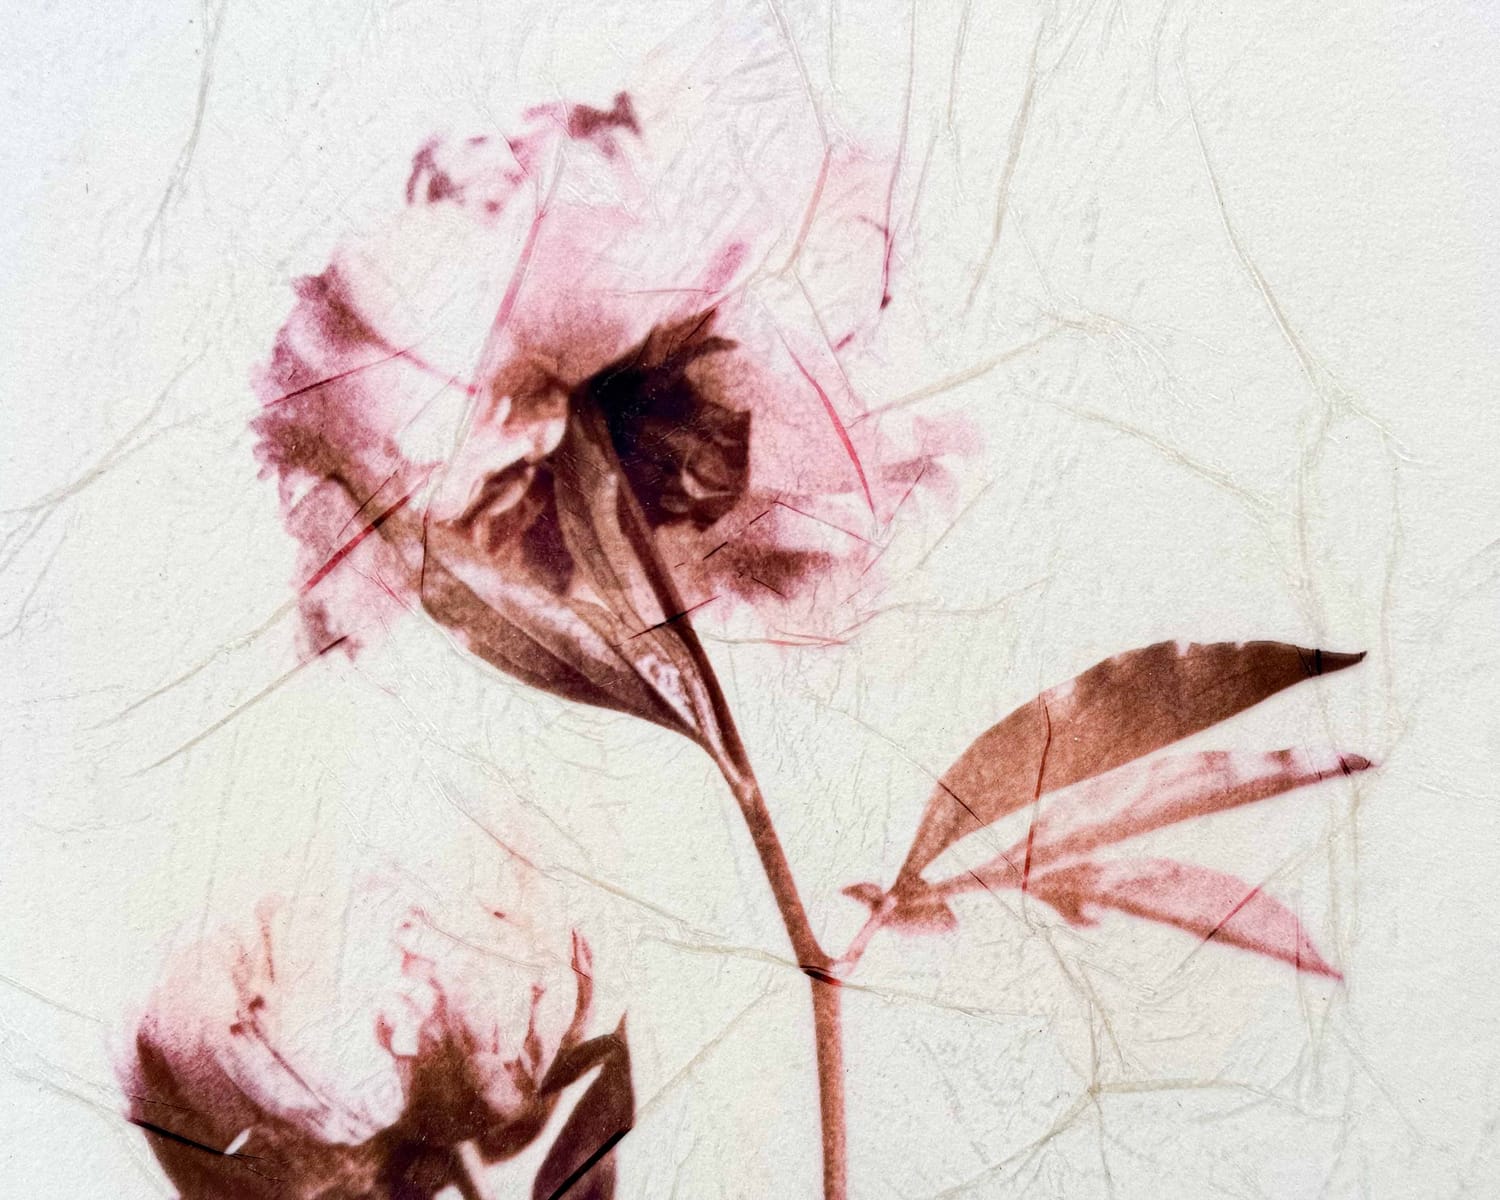
“First of all, thank you so much for this wonderful discovery!!! It opens up so many creative possibilities.
I’ve been an amateur photographer since retiring and I’m part of a photography club, but I don’t always connect with the constraints that come with that environment. Your technique gives me the opportunity to create differently and explore another path entirely, and I’m truly delighted about that.”
Francis A.
Amateur photographer
“First of all, I wanted to thank you for the quality of the workshop you created. Your work is truly inspiring, and I really love the way you share and transmit your process.”
Béatrice S.
Professional Artist
“Your workshops are perfect for reigniting my creativity. After spending many years focused on photography, especially black and white work, [...] your workshops opened up the possibility of combining photography with different techniques that create truly stunning results, and it has completely revived my creative energy.
A huge thank you for that!”
Eric M.
Photographer
We have never produced and consumed so many images.
Instant, endlessly editable, generated in seconds, perfect but smooth…
And yet many artists and creatives today feel the need to return to something more alive.
For more than twenty years, I have been exploring transfer processes that let images break free from pixels and find a physical, sensitive and deeply embodied presence again.
With Inkjet Lift, the human hand comes back to the heart of the artistic process.
What you will find in Inkjet Lift
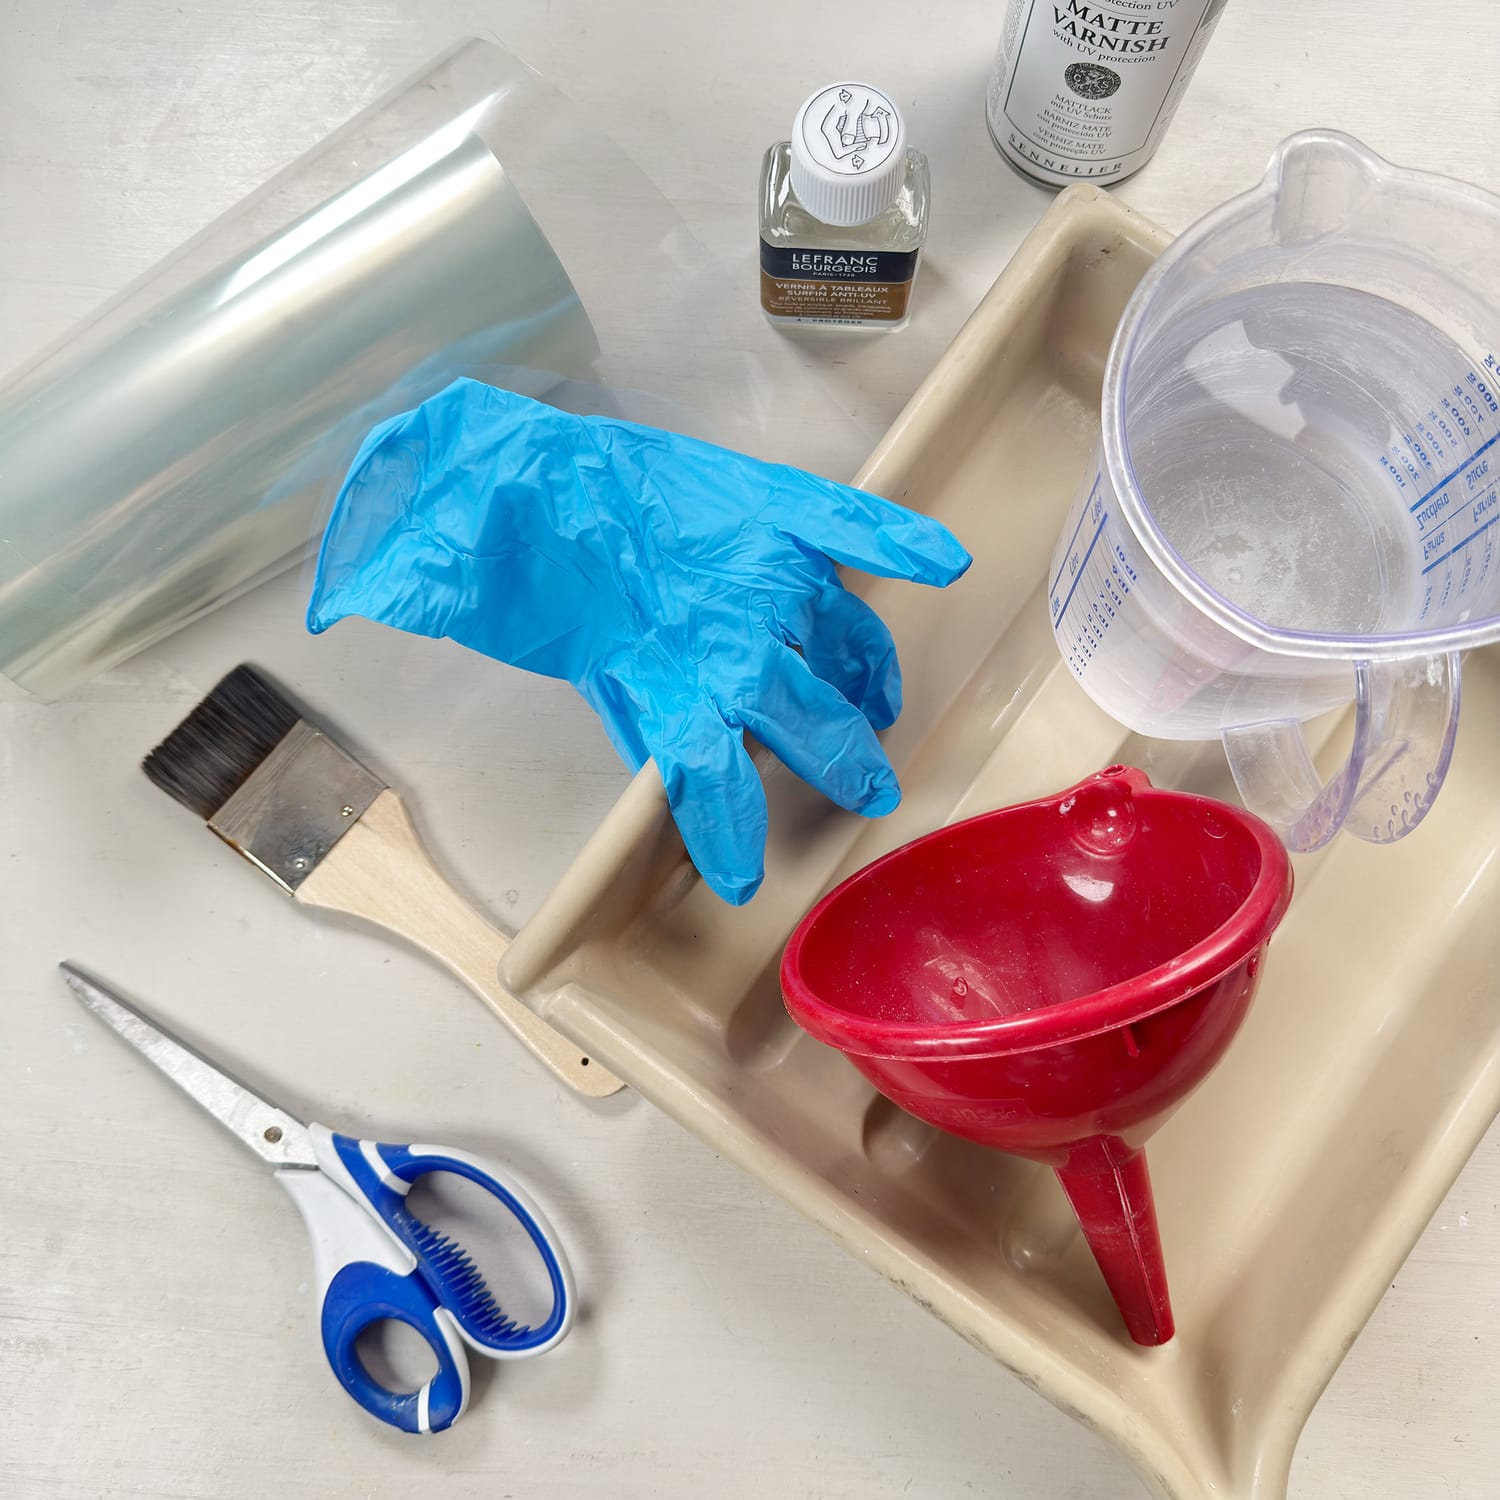
Materials
All the materials used in the Inkjet Lift workshop have been selected and tested so they stay affordable and easy to find.
In this video, I help you choose the right inkjet transparency films and understand the differences between compatible materials.
You will also discover the tools that are truly useful, so you can succeed without spending money on unnecessary or expensive equipment.
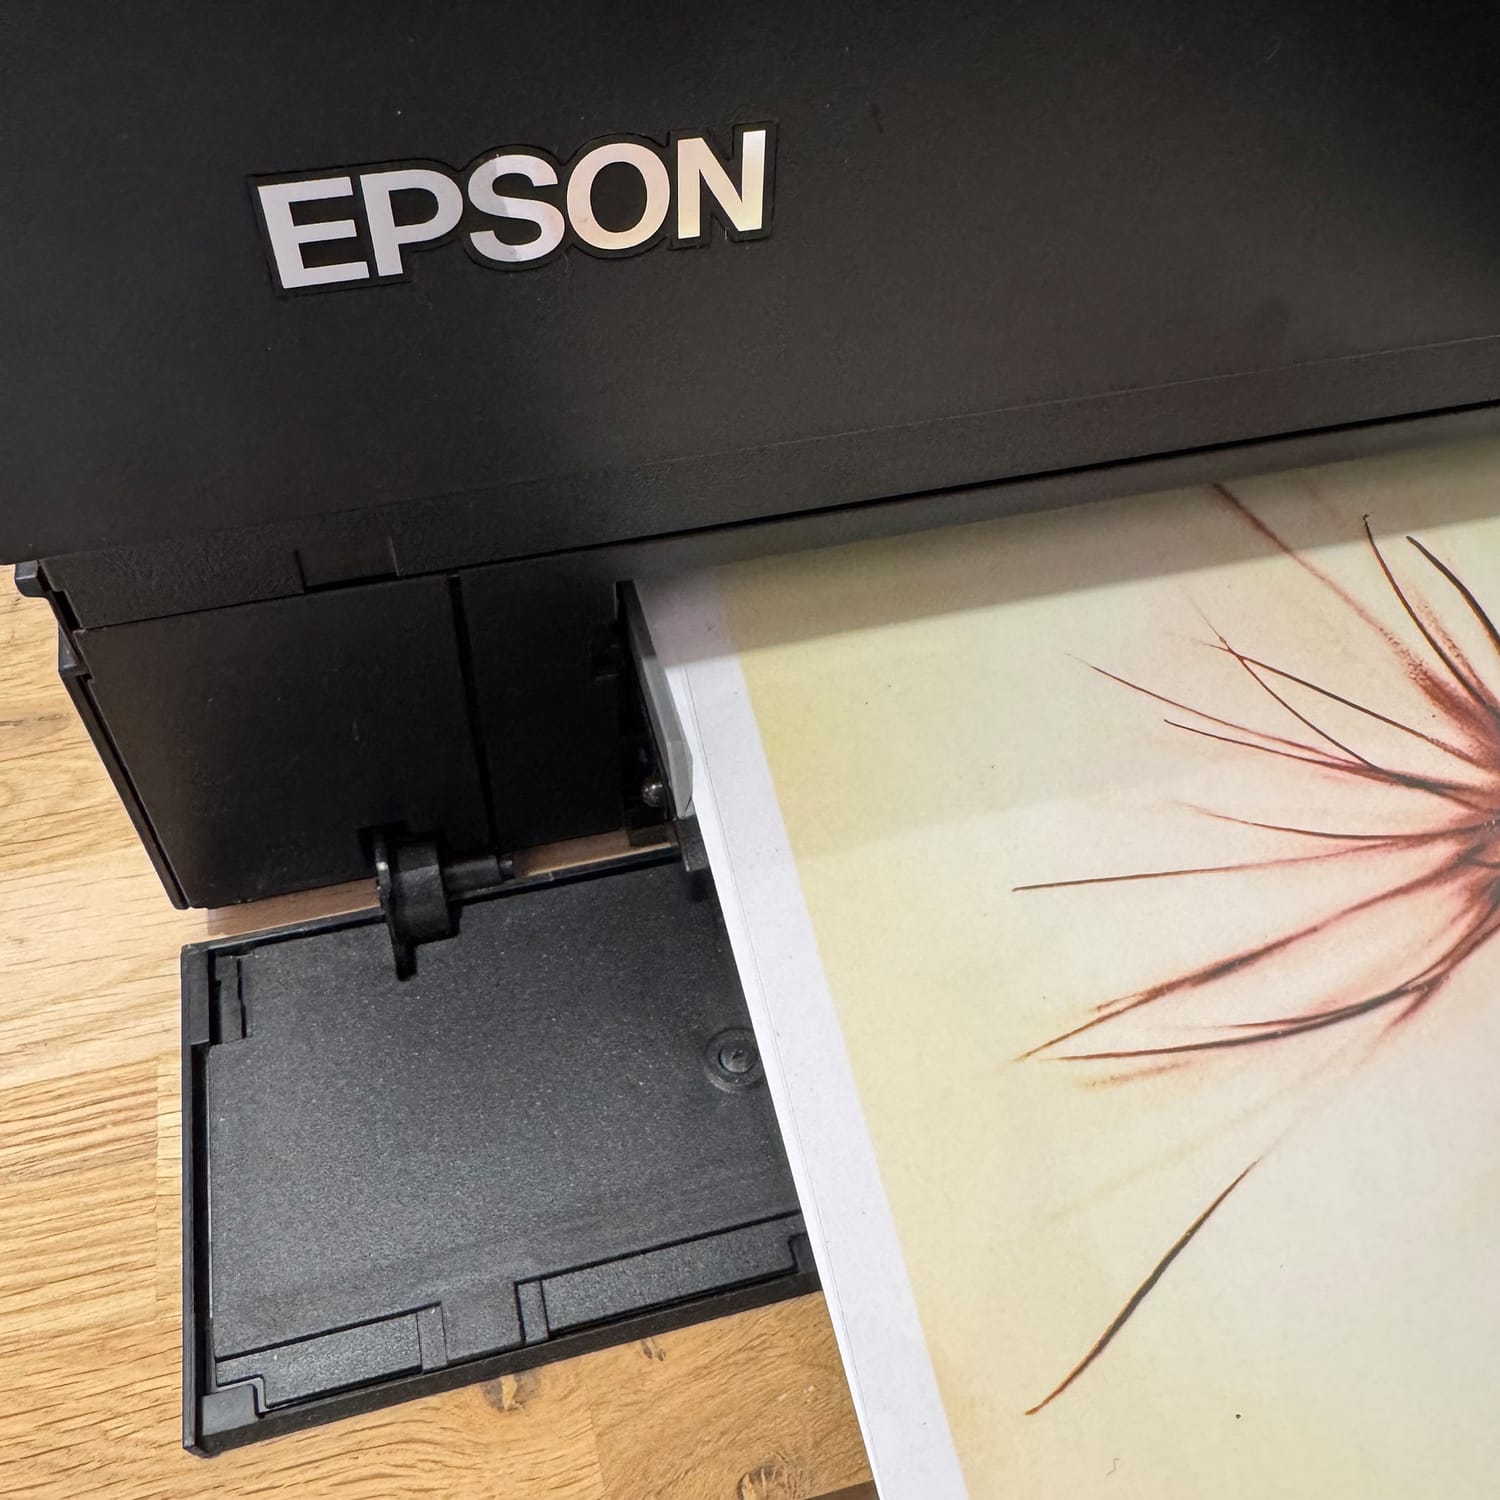
Printing the transparencies
Some printers refuse to recognise inkjet transparency films. I show you the method I use so that my printer accepts them every time. And if you use an Epson A3+ or A2+ printer (13 in or 17 in wide), I explain how to avoid the small marks left by the feed wheels.
I also share a few settings that give the best results for your prints.
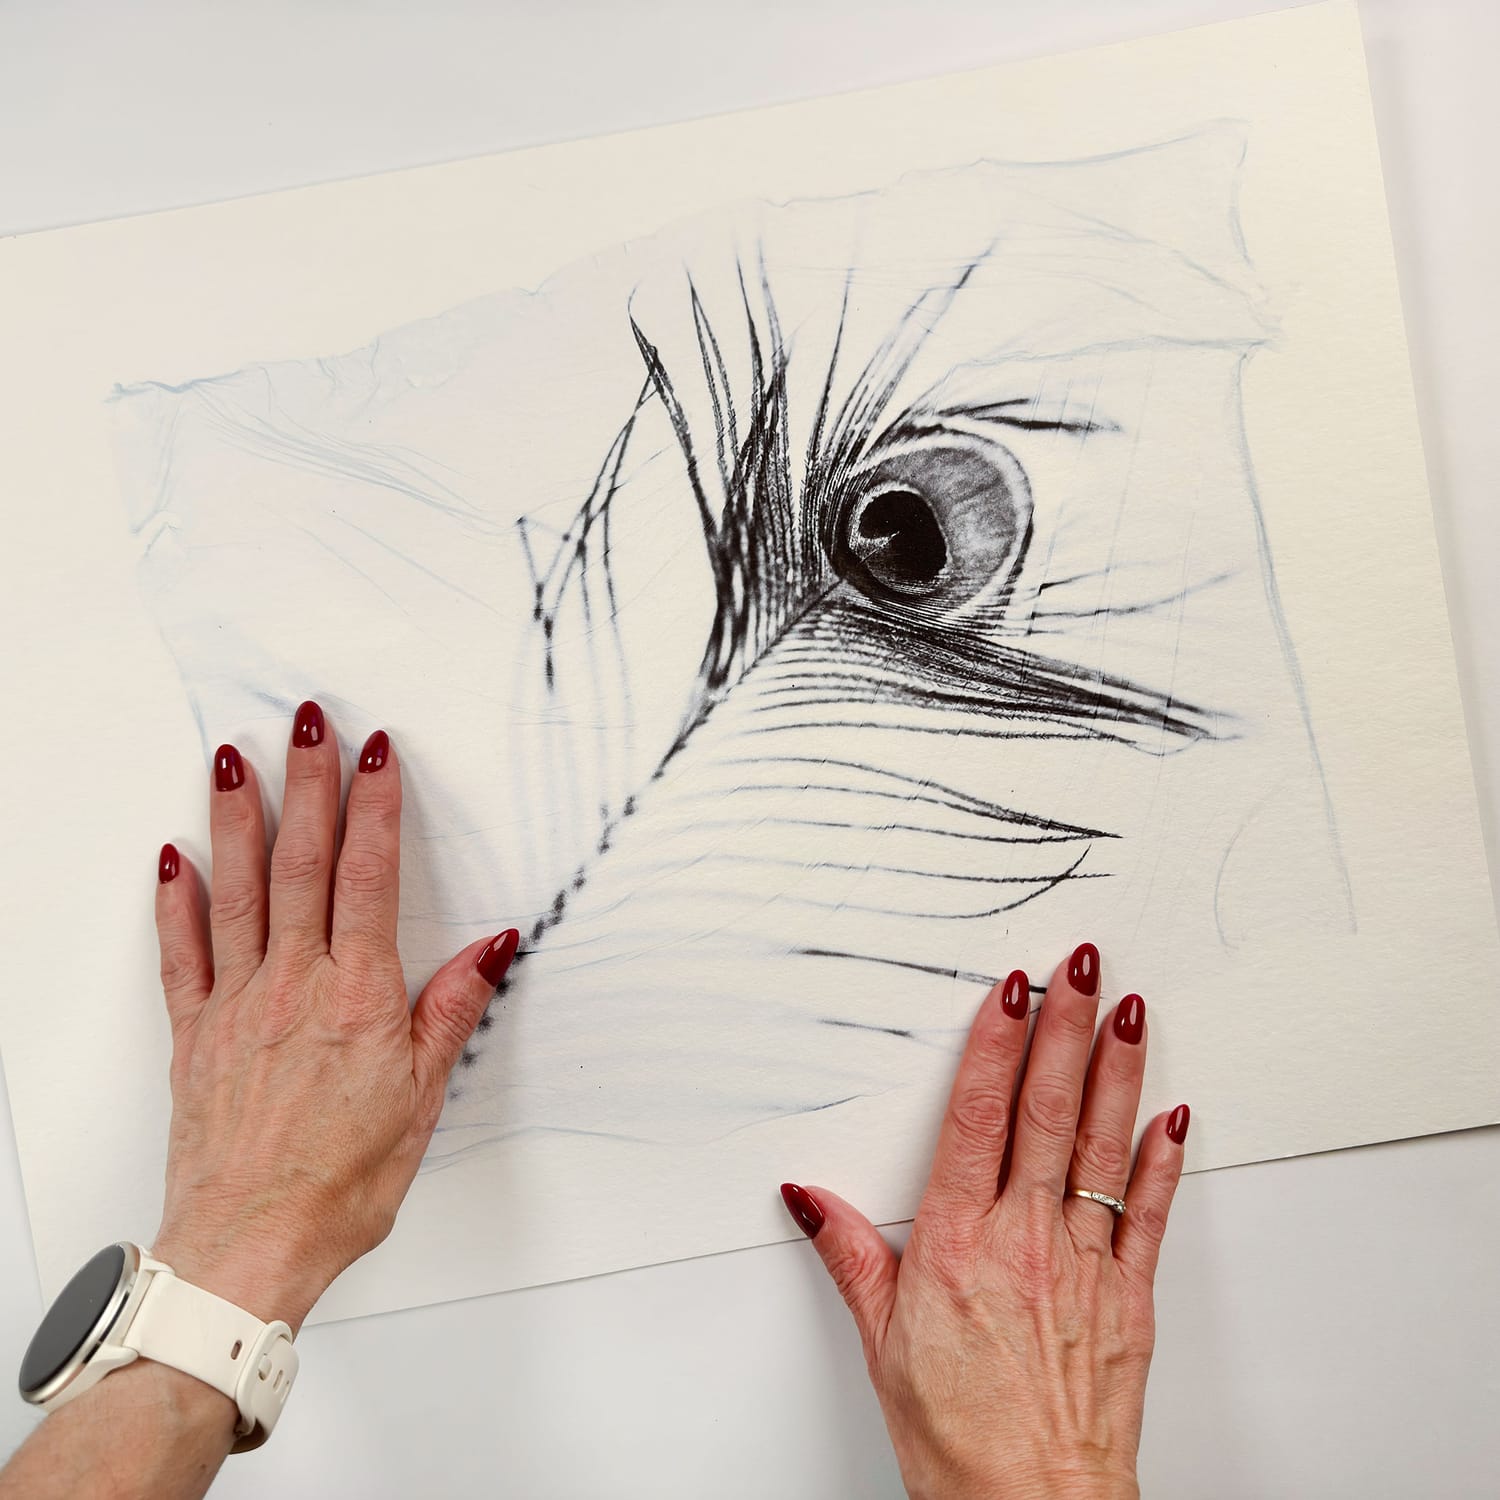
2 distinct methods
I offer you two ways of working. What they share: both let you recapture the fineness and delicacy of a Polaroid emulsion lift, from your own digital photos.
The first is the one I keep mostly for small formats. It gives an emulsion of extraordinary fineness that literally melts into its surface.
The second offers a sturdier veil, easier to handle, and opens the door to large formats. Compatible with most inkjet transparency films, it grows with your practice: with each attempt, you will move towards a finer and finer veil.
I show you each method step by step, in real time.
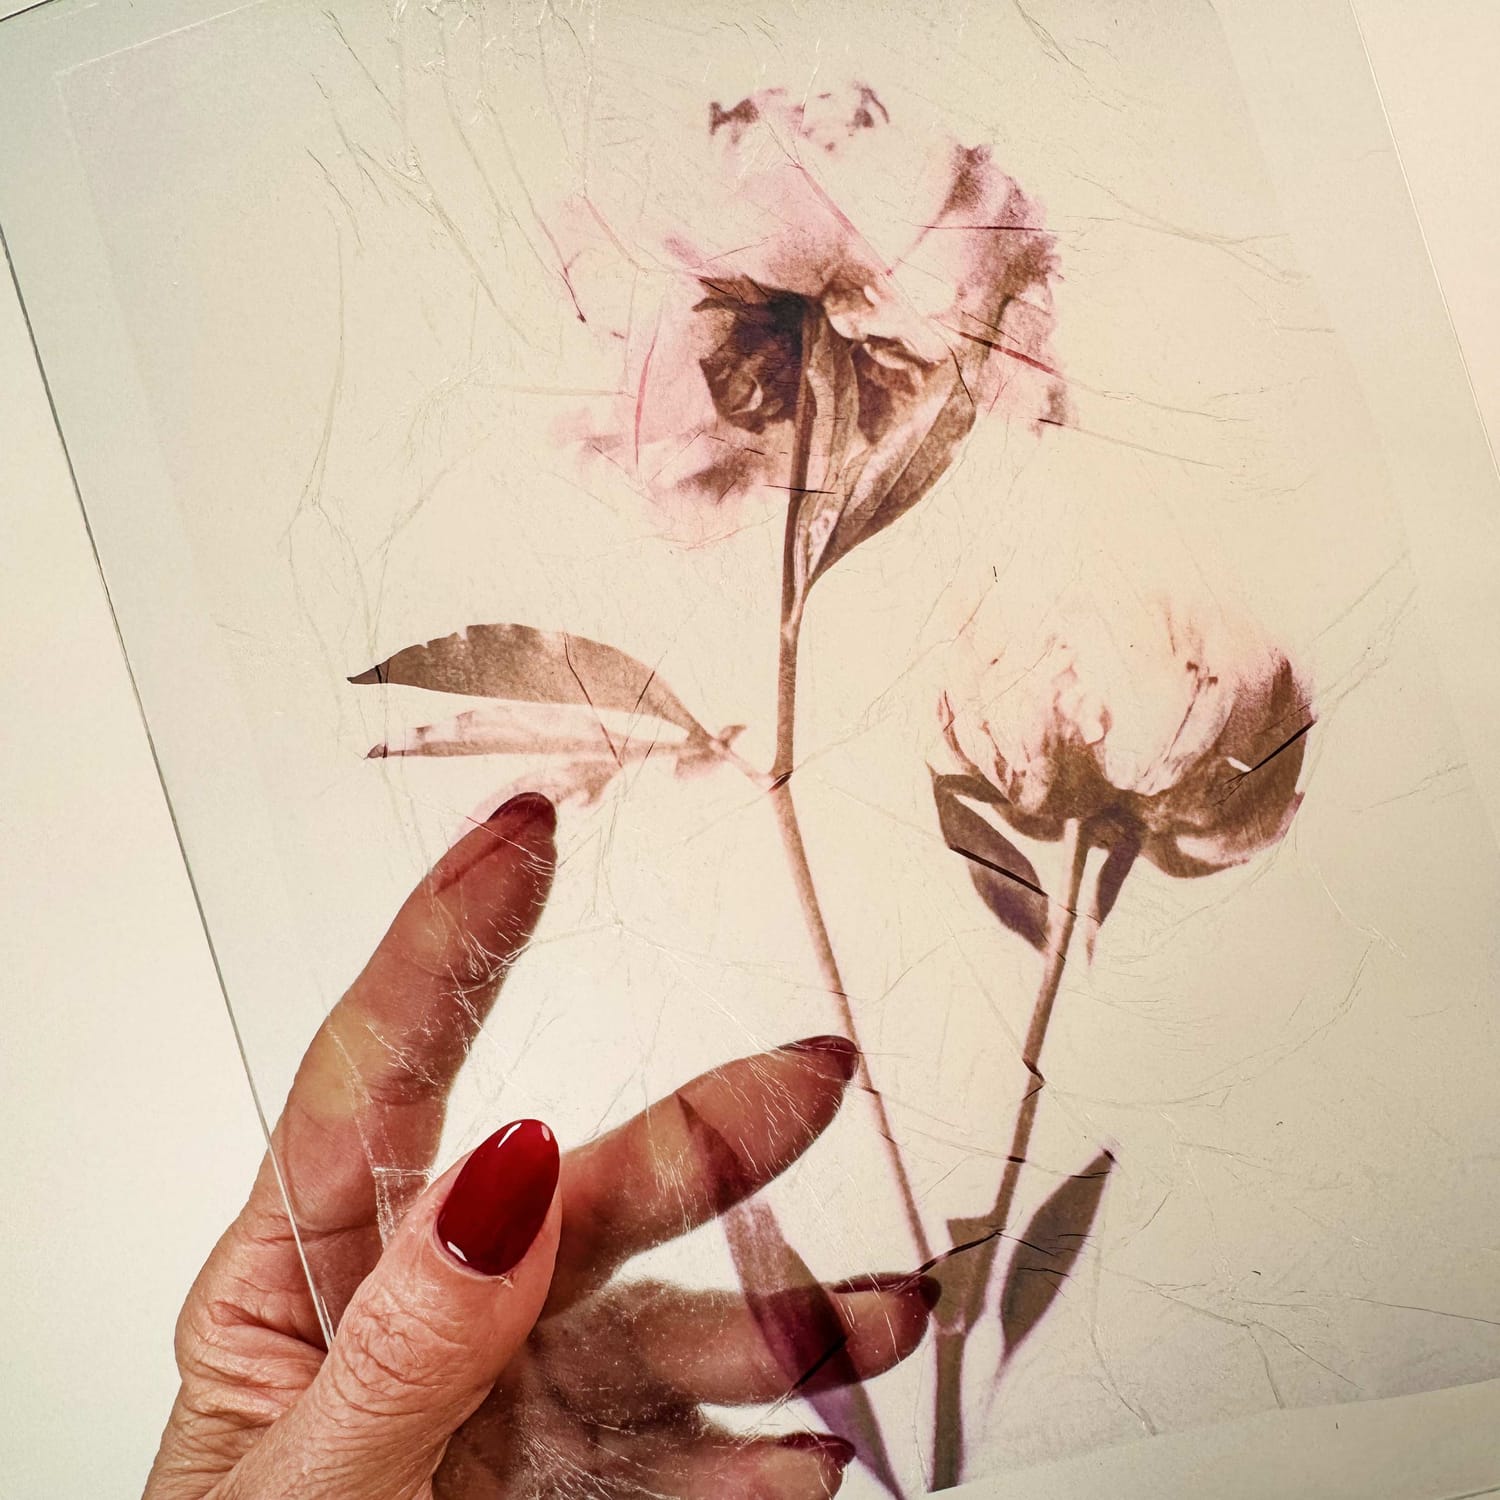
On glass and mirror
These surfaces instantly change the way you relate to the image. The veil no longer just floats on a surface: it plays with reflections, light and the space around it.
In two videos, one for each method, I show you step by step how to lay the transparent emulsion onto a mirror and then onto glass, how to position it patiently, and how to keep all its fineness until it dries.
Two fascinating surfaces that reveal the full transparency of the process.
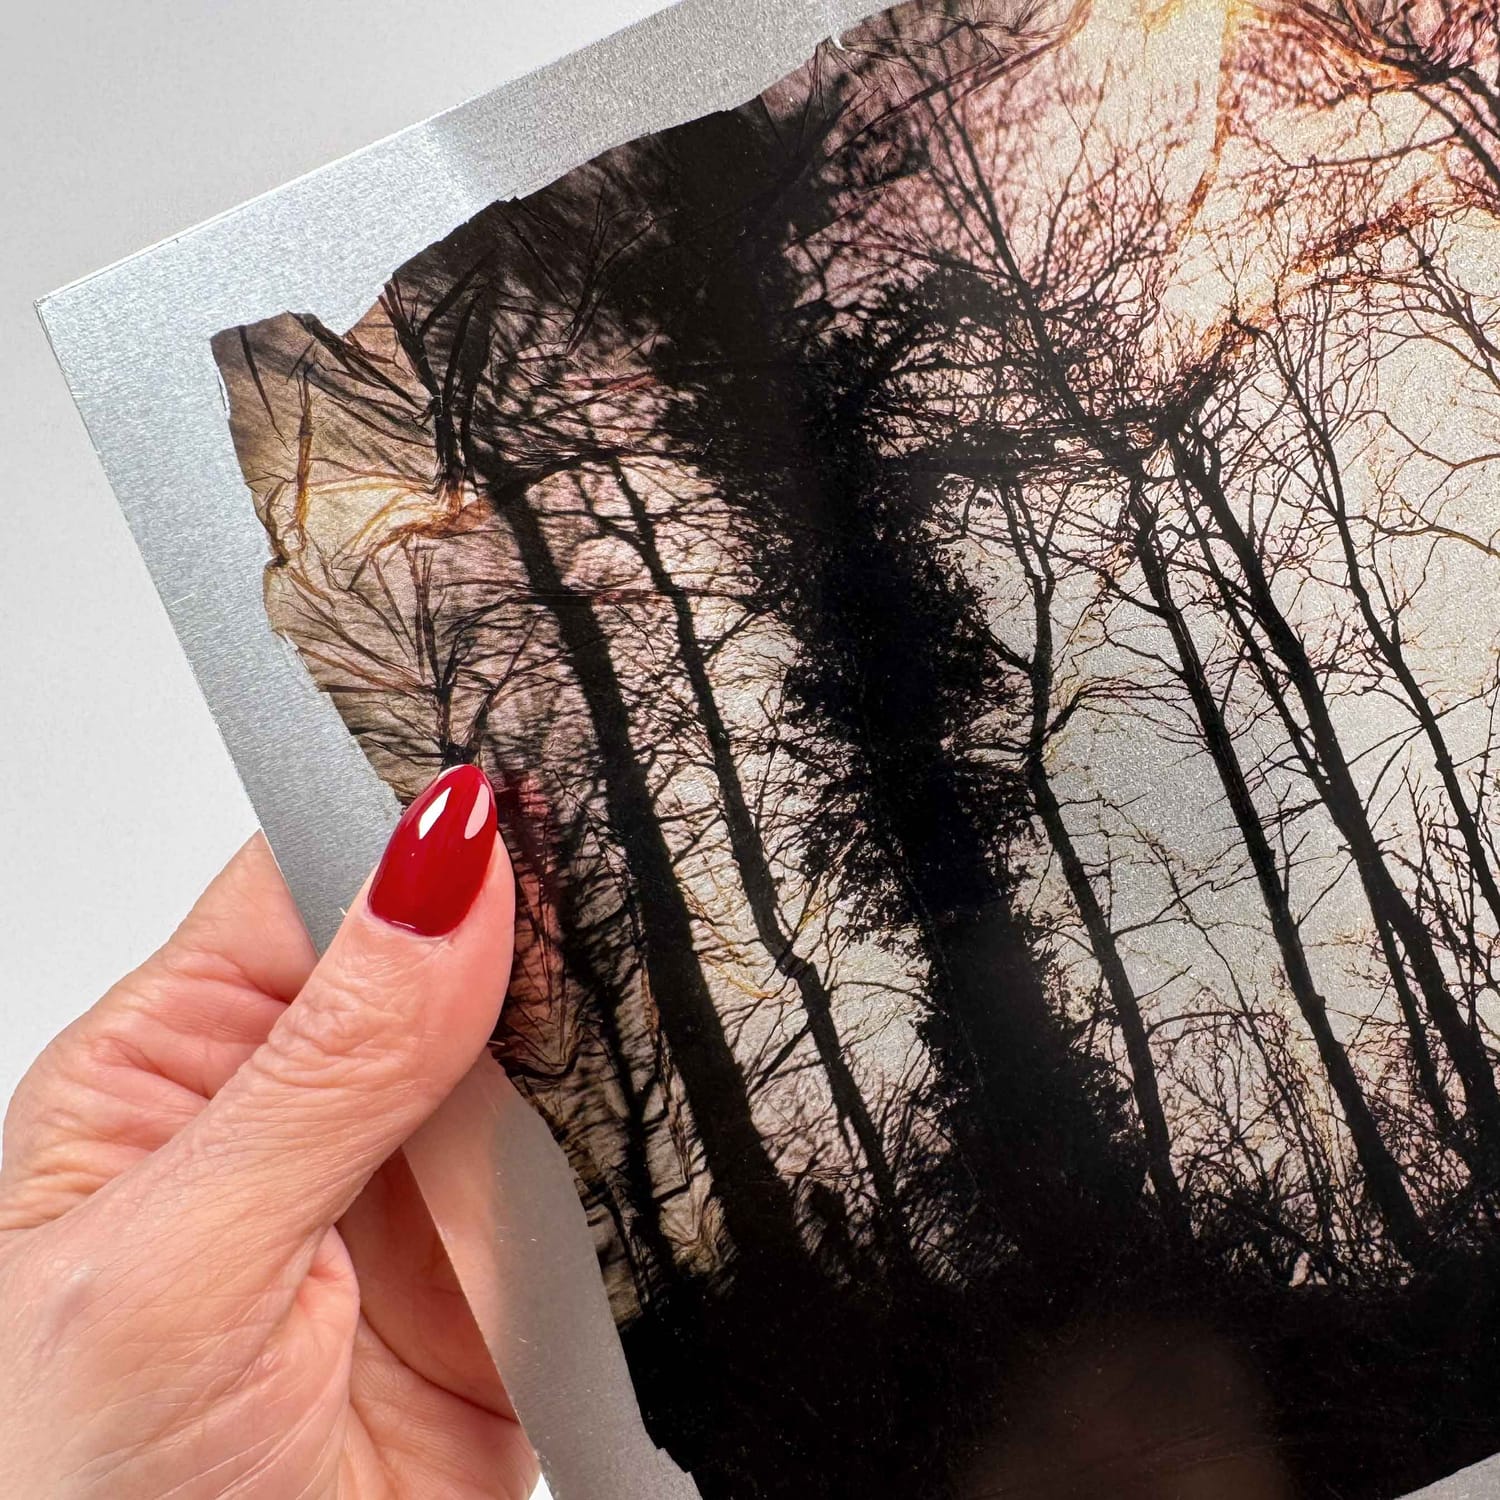
On metal
Metal instantly gives the image veil a very special density and depth.
The emulsion hugs the surface of the metal and lets through the light it reflects.
In this part of the workshop, I show you step by step how to prepare your brushed aluminium plate, how to lay a very thin veil without damaging it, and how to fix the small tears that are part of the game.
Metal is a field for experimenting, where emulsion lift reveals all its sensuality.
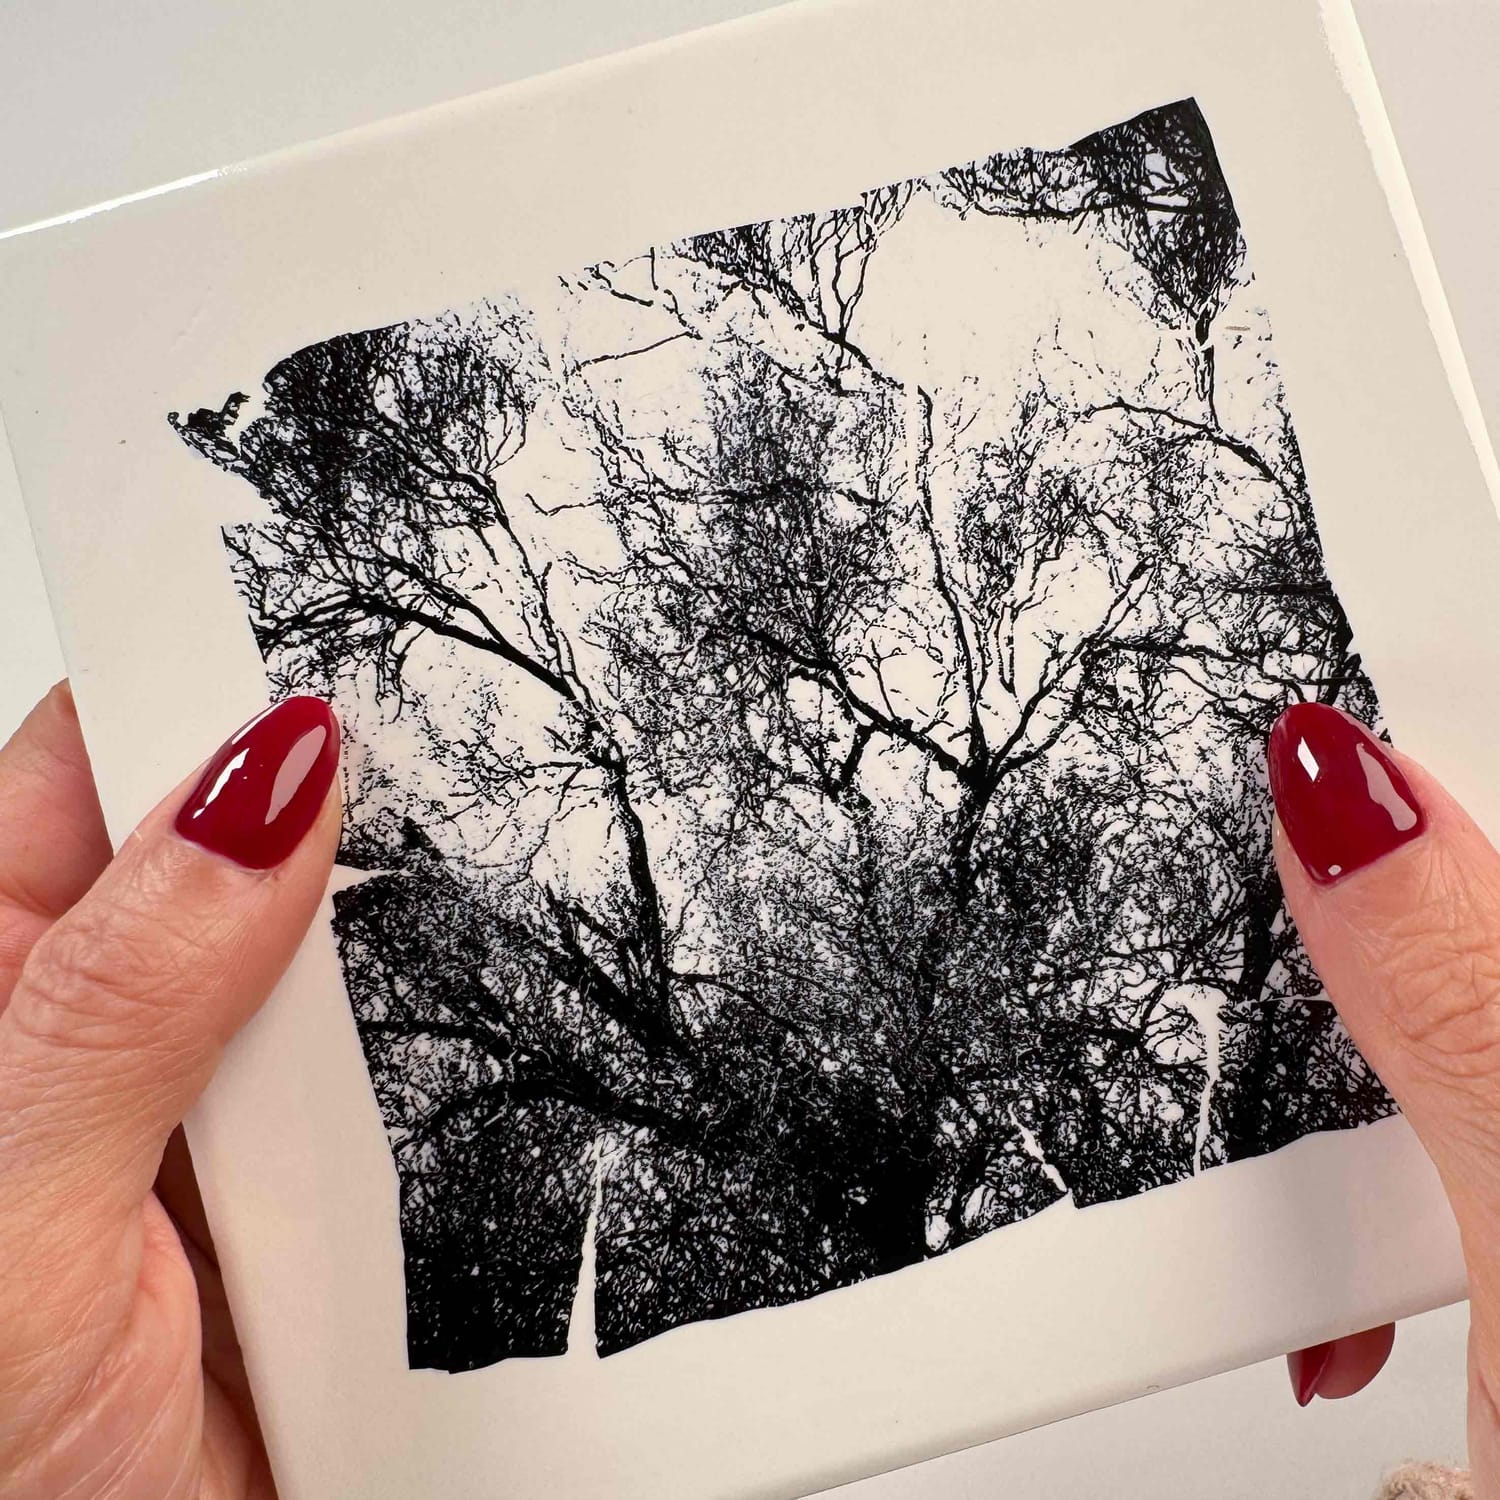
On ceramic tile
On ceramic, the smooth, shiny surface interacts with the image veil in a very particular way.
In this part of the workshop, I show you how to lay the emulsion onto a ceramic tile, and how to use its flexibility to stretch it, tear it on purpose and let what lies beneath show through.
I also share the small gestures that prevent air bubbles and limescale marks as it dries.
An ideal surface for daring, more organic and freer results.
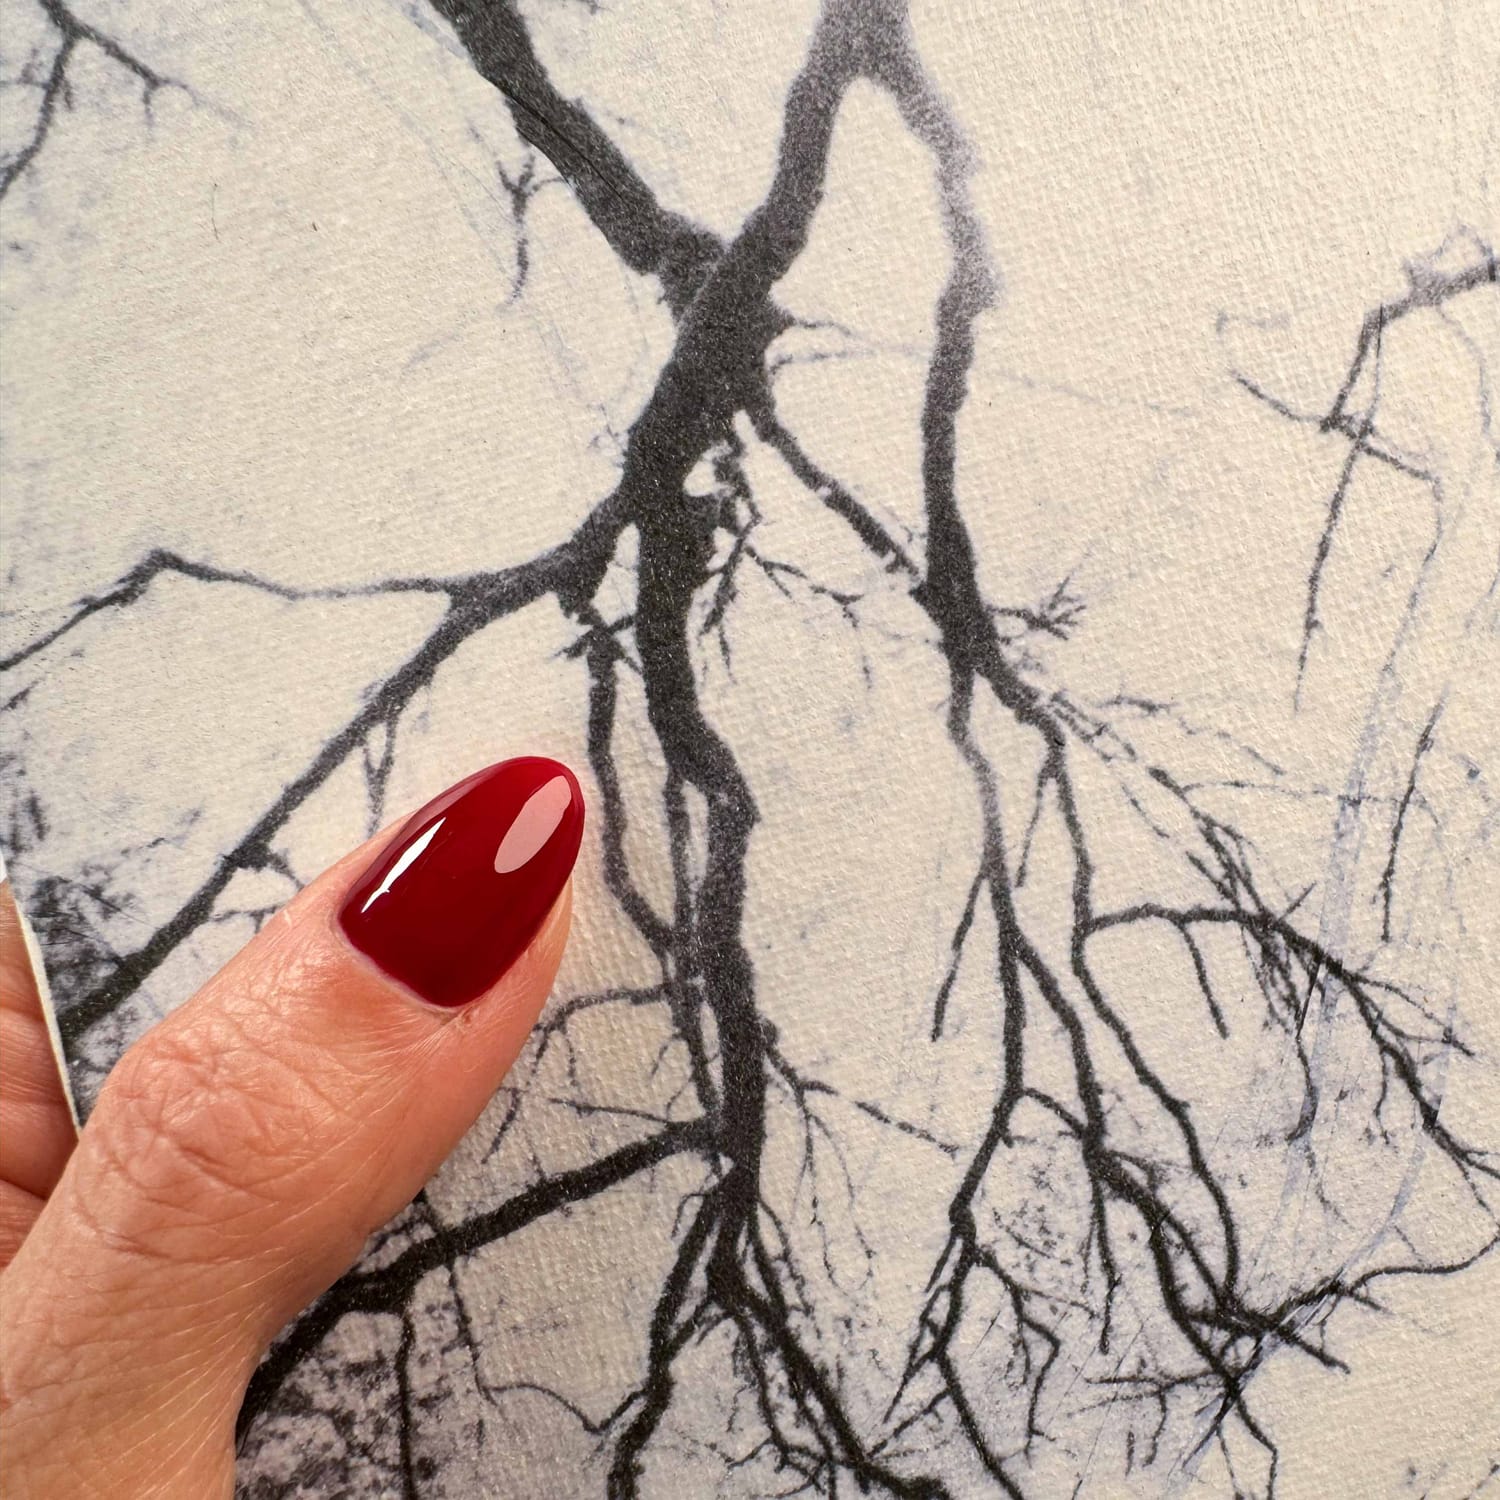
On Japanese paper
Japanese paper gives the image veil a unique lightness and delicacy.
Here I work on a 9 gsm tissue paper (9 g/m², about 0.27 oz/yd²): the fibres, transparency and fineness of the paper blend with the emulsion to create a unique result.
I show you how to handle these extremely thin papers, how to lift them without tearing them, and then how to mount your work onto canvas. A way to put your images onto surfaces that cannot be soaked in water.
On fabric
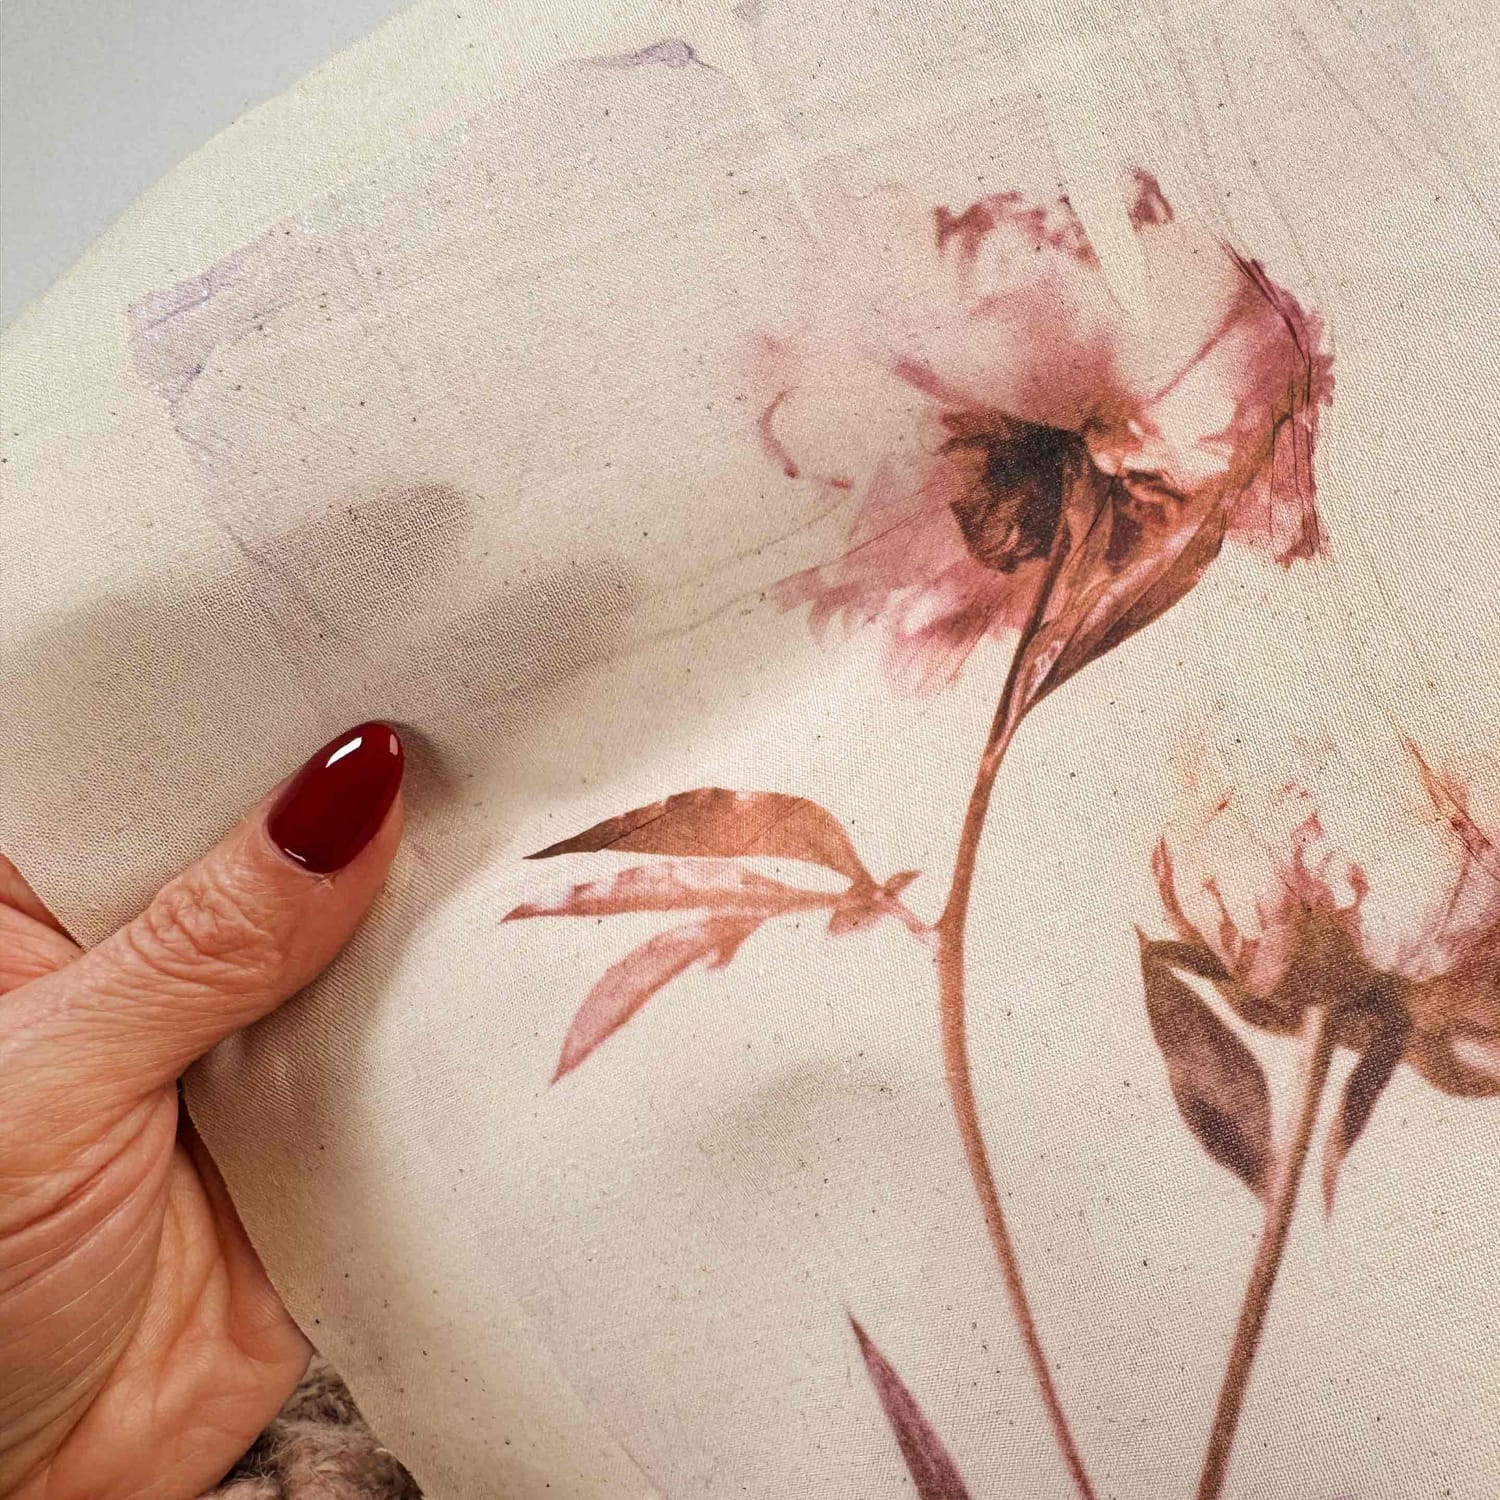
Fabric opens up a more experimental territory for emulsion lift. In two videos, one for each method, I show you two very different results. With the first, the emulsion is so thin that it almost melts into the fabric and becomes one with its weave. With the second, you work in a larger format.
I also explain which fabrics to choose.
This surface opens up exciting possibilities for artists and creatives who want to take their images further with thread, embroidery, beads or other artistic additions, on decorative pieces only, since the lift cannot be washed.
On wood
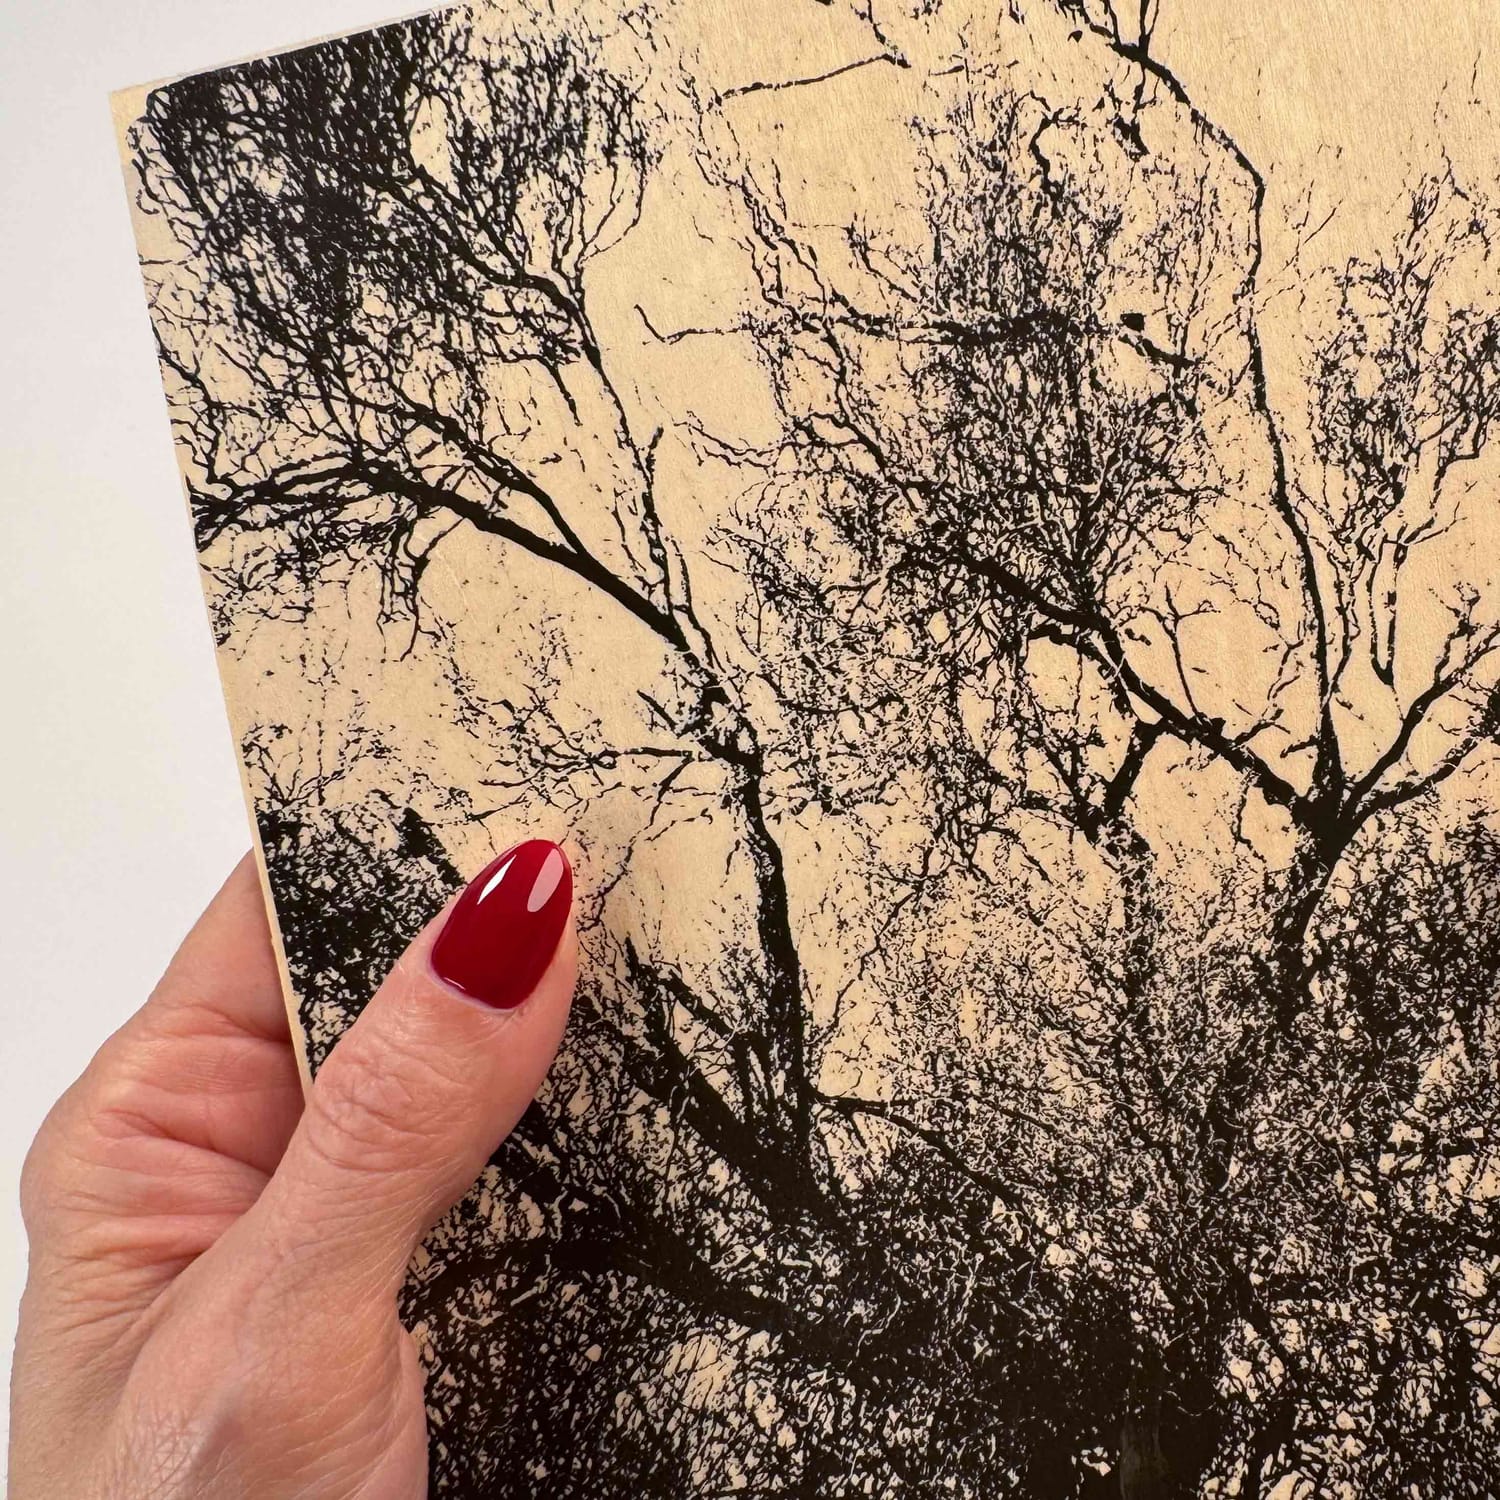
Wood instantly gives the image veil a very special warmth, depth and presence.
Thanks to the transparency of the emulsion, the fibres and grain of the wood stay visible under the image, creating organic and deeply embodied results.
Wood cannot be soaked in water: I show you how to prepare it so it resists moisture, and the trick that lets you carry the veil onto it. A trick you can use on every surface of this kind.
Working with gold
An image veil that plays with the light of gold!
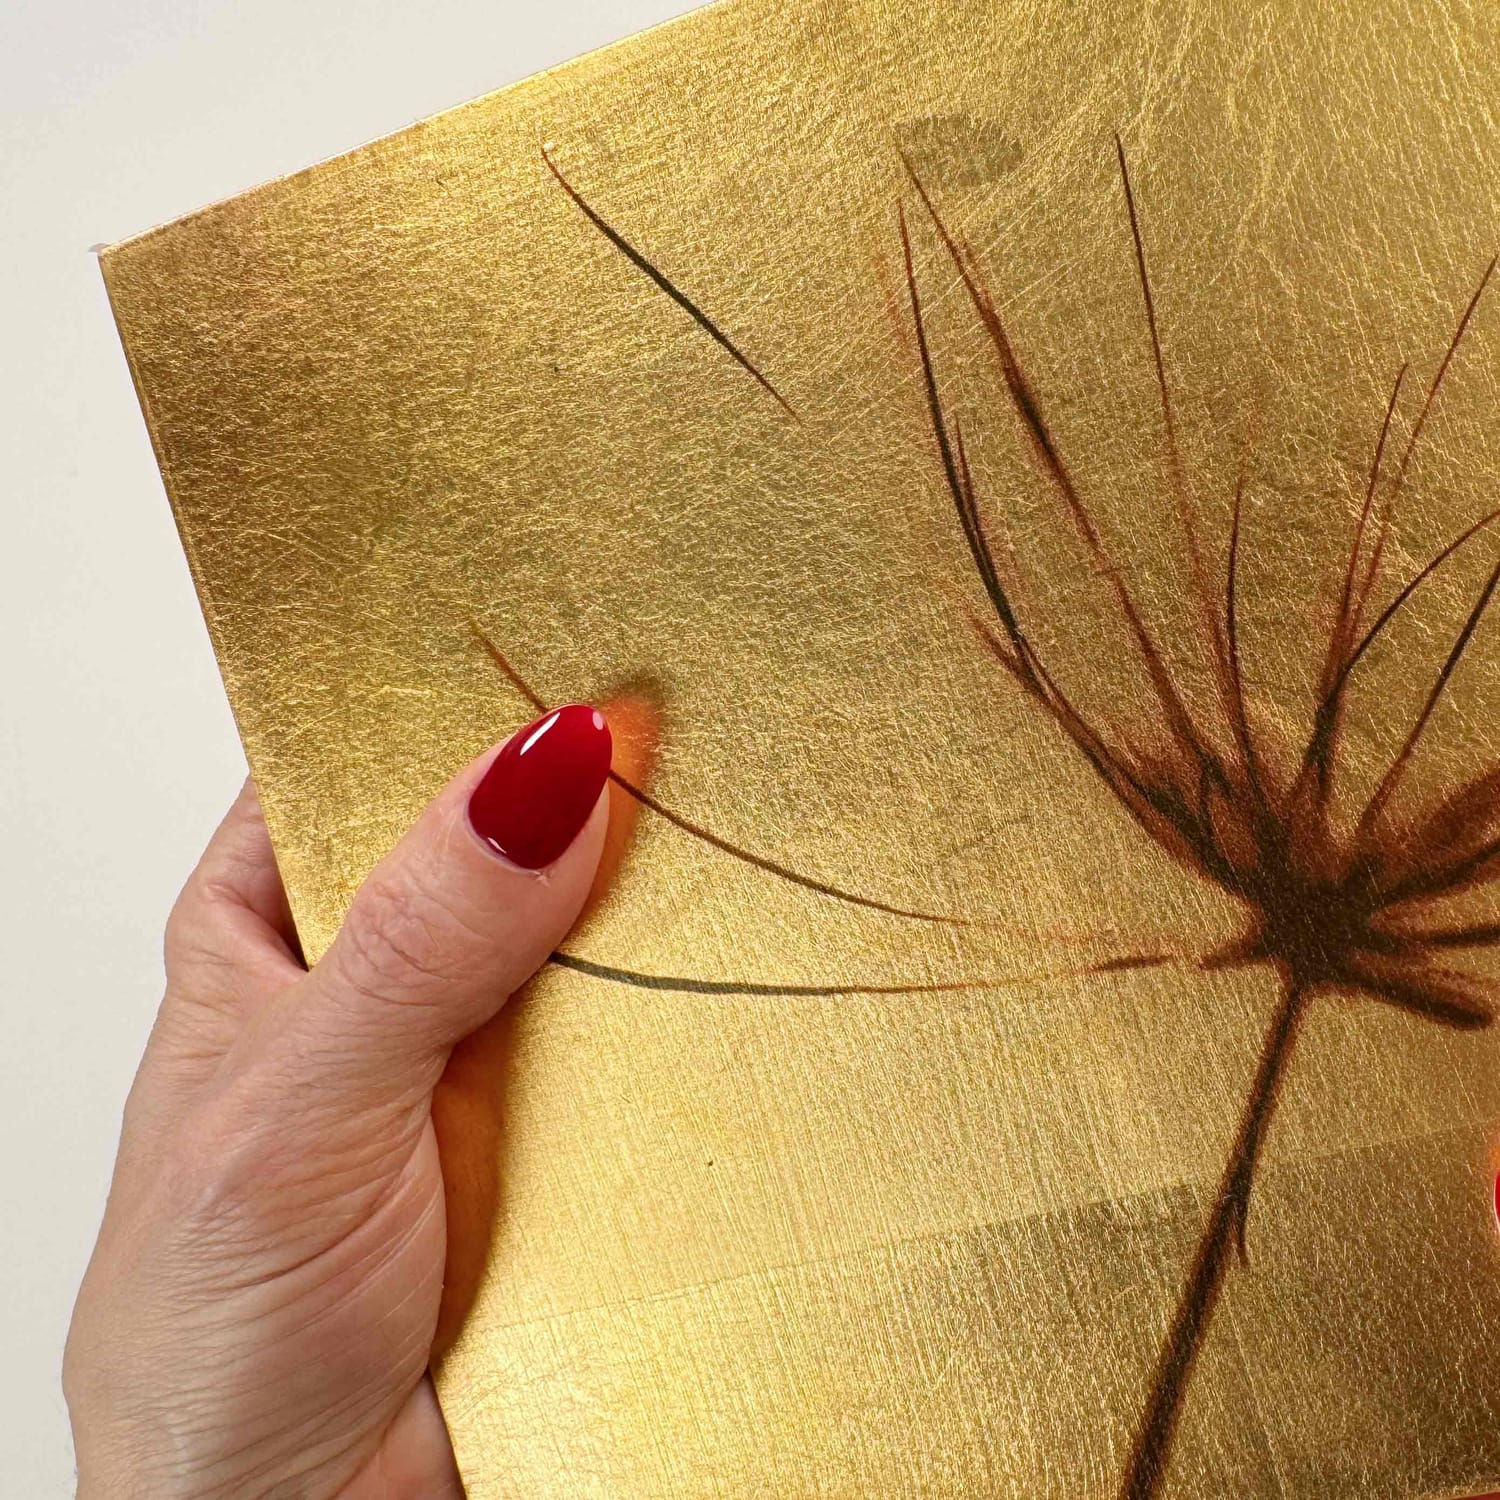
In this video, I show you how to lay your emulsion onto a gold leaf panel, and then how to combine gold and the veil on glass, in the style of an orotone.
Gold and inkjet emulsion work together: the image seems to glow from within.
9 surfaces, 9 inspirations
1000 possible creations
Once you have mastered the basics, you can try your own experiments and develop a unique artistic world, with no limits.
What is inkjet emulsion lift?
Inkjet Lift is an inkjet emulsion lift technique, as I have practised it for many years and teach it today: the ink layer of a photo printed on inkjet transparency film is lifted into a translucent veil, then laid onto paper, glass, metal, wood or fabric.
It is also called emulsion lift or emulsion transfer. Unlike transfer with a transfer solution, the image does not simply move from one surface to another: it comes away as a free veil, which you can crease, tear and layer.
How it works, in 4 steps:
1. Print your photo on inkjet transparency film, with a pigment or dye ink printer. Not all transparency films can be lifted: I tell you which ones work.
2. Release: a simple preparation, using one of the two methods, lets the ink layer come away from the film.
3. Lift: you gently lift the image, which becomes a thin, translucent veil.
4. Lay down: you place the veil on the surface of your choice and give it its shape: smooth, creased, crumpled, torn.
Lift the same image ten times, and you will get ten different works.
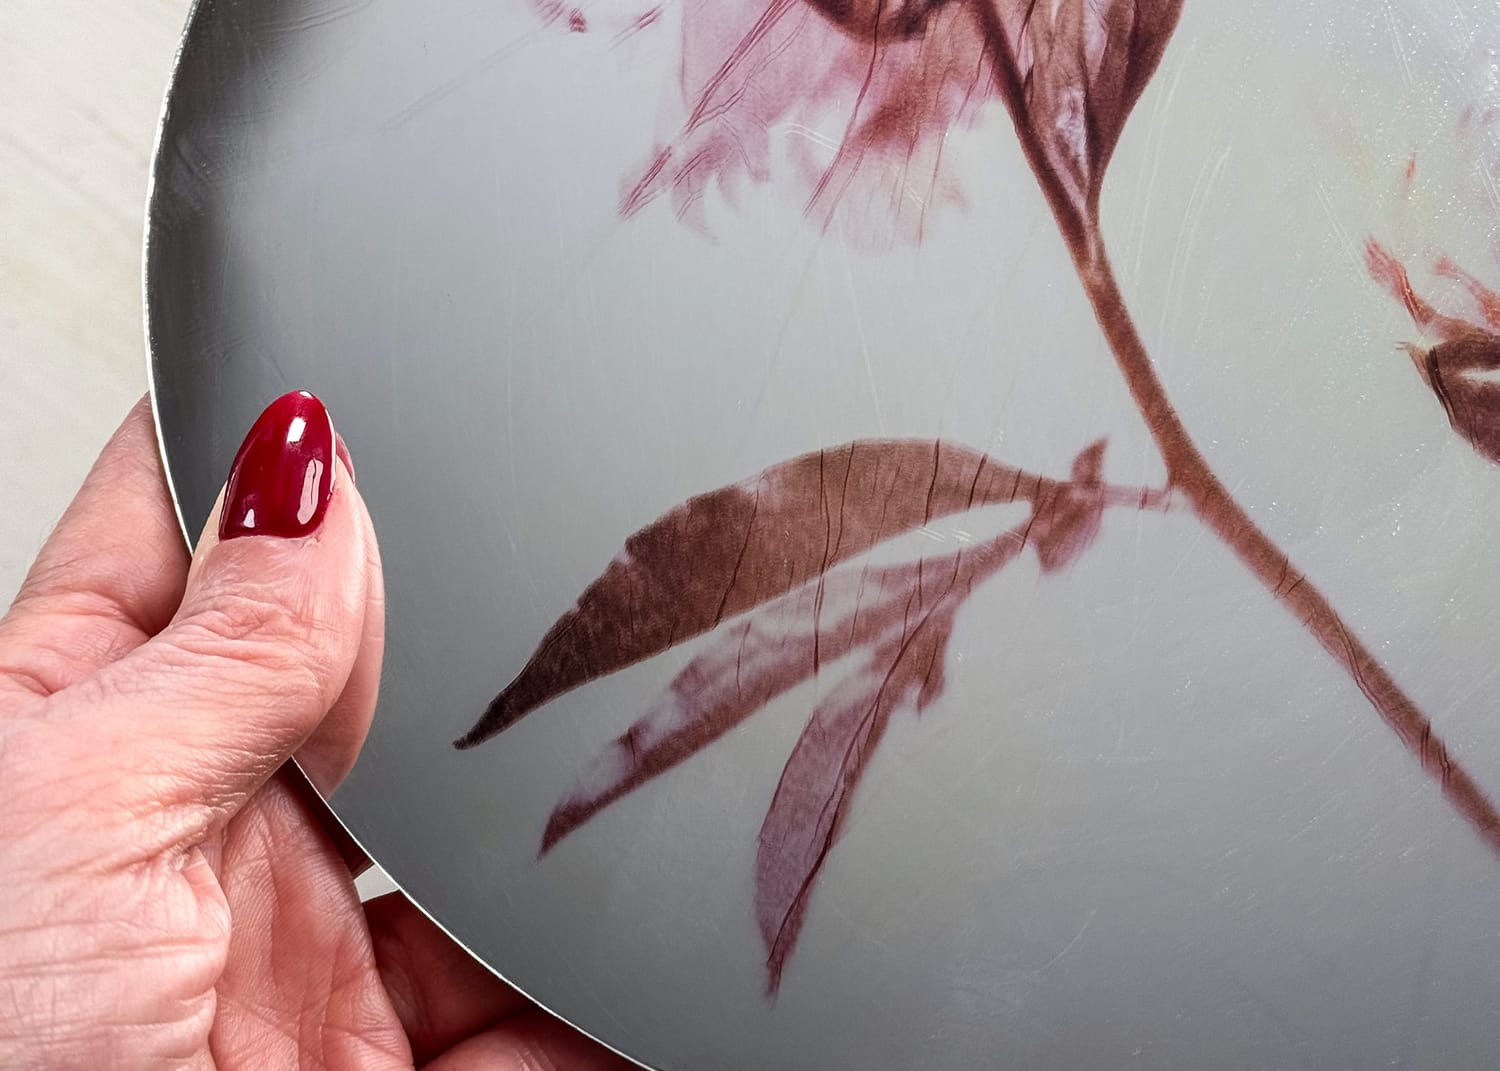
Inkjet Lift on mirror (detail)
Why share my techniques
in the age of AI?
Today, tutorials are everywhere, including AI generated ones. I have tested some: the answers are absurd, and they simply don't work.
I have always loved experimenting and looking for new techniques. It is how I feed my creativity as an artist. But very often, I wished I could find clear, accessible resources to move forward faster.
That is why I put so much care into this workshop: I created what I would have dreamed of finding when I started, and what AI will never be able to offer. Real gestures, filmed in real time.
A space where you learn step by step, where you allow yourself to explore, experiment and make mistakes. And a private community where you are no longer alone in your studio, where I answer your questions and where we celebrate creativity.
I share all of this with you today, with all my heart.
One thing is certain: in the age of AI, handmade is sexy again!
Why share my techniques in the age of AI?
Today, tutorials are everywhere, including AI generated ones. I have tested some: the answers are absurd, and they simply don't work.
I have always loved experimenting and looking for new techniques. It is how I feed my creativity as an artist. But very often, I wished I could find clear, accessible resources to move forward faster.
That is why I put so much care into this workshop: I created what I would have dreamed of finding when I started, and what AI will never be able to offer. Real gestures, filmed in real time. A space where you learn step by step, where you allow yourself to explore, experiment and make mistakes. And a private community where you are no longer alone in your studio, where I answer your questions and where we celebrate creativity.
I share all of this with you today, with all my heart.
One thing is certain: in the age of AI, handmade is sexy again!
High quality content for the best experience
I took great care with the quality of the videos (HD) and the sound, to give you a pleasant experience and teaching where no detail escapes you.
The videos are filmed in French, with French and English subtitles. For English speakers, automatic English dubbing is also available: handy, even if it is sometimes approximate. If in doubt, trust the subtitles.
Below, a few clips from the workshop...
17 videos to
Choose the right materials
Print your transparencies properly
Master two emulsion lift methods
Explore mirror, glass, metal, ceramic
Explore watercolor paper, Japanese paper, wood, fabric
Work with gold
Protect your creations
Understand your mistakes and make the most of them
What if your images could finally break free from pixels?
Launch Offer
Inkjet Lift
Until November 22
Full access to the workshop
180 €
140 €
Payment 1 x 140 €
or 2 x 71 €
Why this workshop?
I have practised image transfer all my life. I started with Polaroid, then with inkjet emulsion lift, which gave birth to my series Les Auras in 2011, exhibited in France and abroad.
In recent months, I came back to this process.
I tested many films, started again, compared, and kept only what really works. From this, I developed two complementary methods, which I explore in this workshop through 11 projects on 9 different surfaces, filmed in real time.
My wish: that you make this gesture your own, freely, in your own practice.
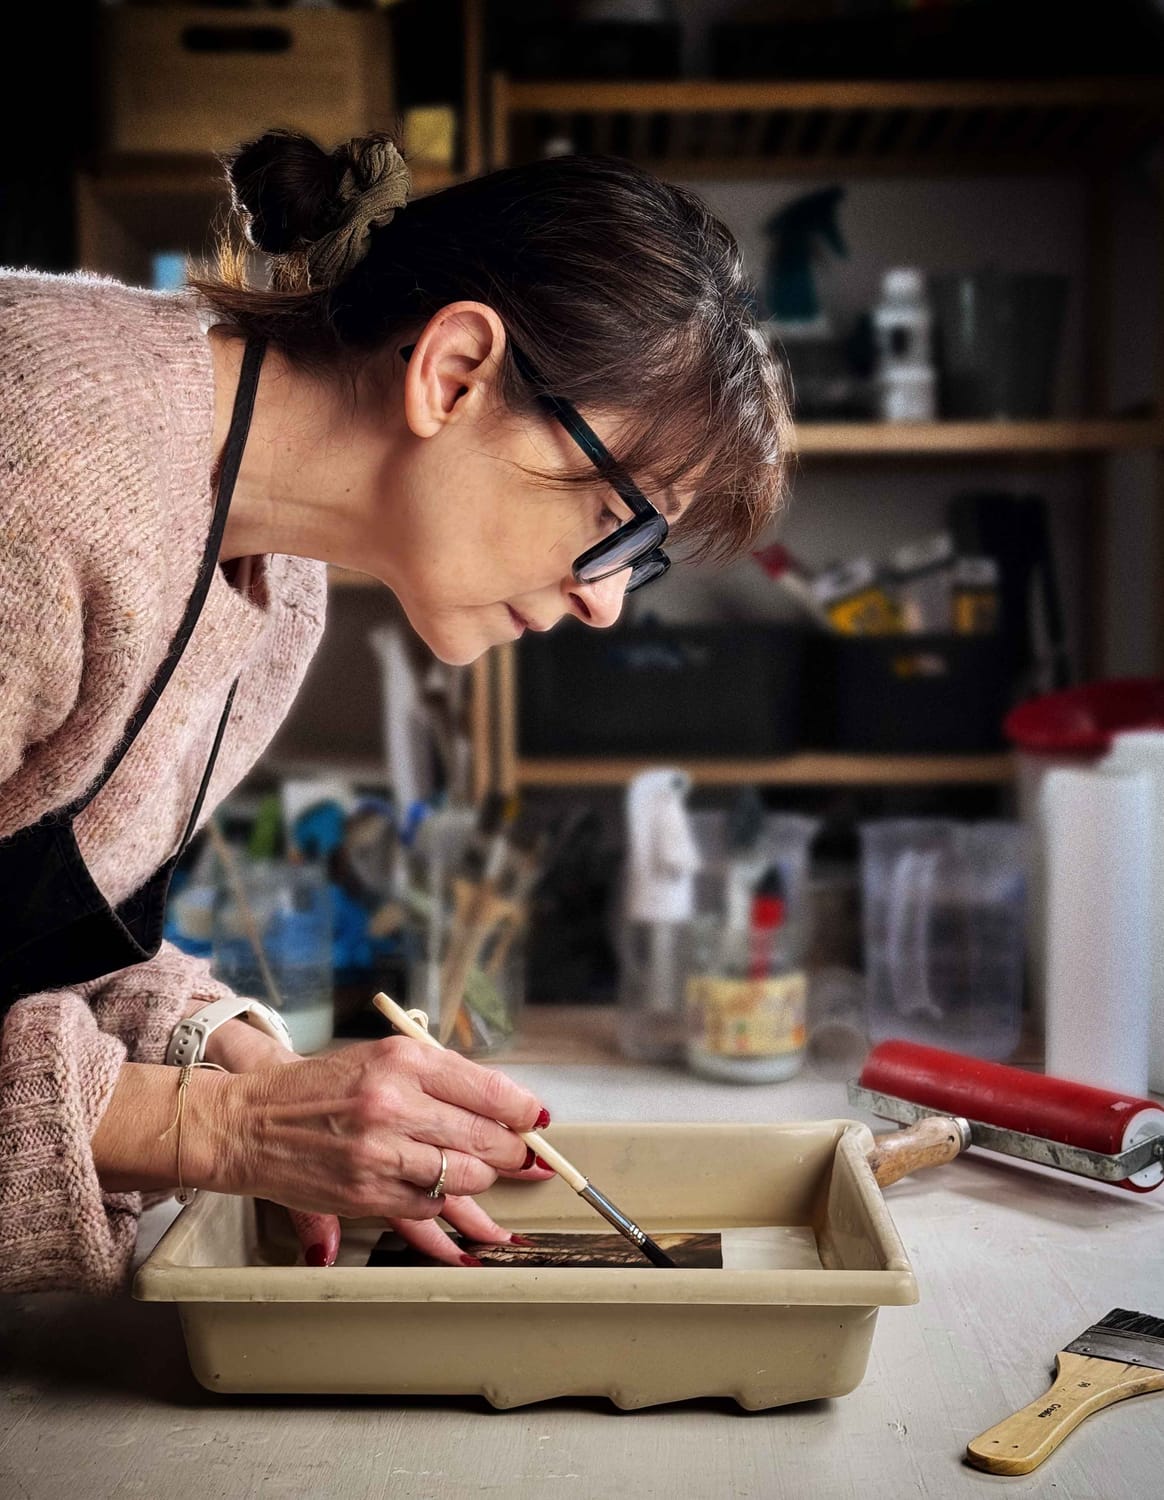
This workshop will change your relationship with the image
Here, the image is no longer just a digital file or a simple print.
You lift it, crease it, lay it down, and welcome the unexpected variations of the material.
Every lift is unique: the same image changes character depending on the shape you give it and the surface you choose.
You no longer produce a smooth image that can be copied endlessly. You explore a lighter, more sensory and freer practice.
And above all, you no longer create alone
Alternative photography techniques change the way we create: trials, accidents, discoveries and even failures become areas of research that we can share.
With Inkjet Lift, you join the Cercle des Ateliers, the private space for participants. There you can ask your questions, which I answer personally, share your experiments and creations, and grow alongside other artists on the same journey.
Because some practices take on a whole new dimension when we stop exploring them alone in our studio.
How to join the workshop
Launch price until November 22
140 €
instead of 180 €
✔️ 17 videos, with French and English subtitles
✔️ Unlimited lifetime access
✔️ Workshop images, free to download
✔️ Materials guide, with links to buy
✔️ “The two methods” step by step guide, to print
✔️ Access to the private community
✔️ I answer all your technical questions
Payment 1 x 140 €
or 2 x 71 €

What happens when you click?
You are taken to a 100% secure order form. You can pay by card or PayPal.
Within minutes of your payment, you receive an email with your access to the workshop and to the Cercle des Ateliers, your private community.

🛡️ 30 DAY SATISFACTION GUARANTEE
You have 30 days to explore Inkjet Lift, lift your first image veils and watch them take shape.
If you have watched less than 30% of the workshop (about 35 minutes of video) and it does not meet your expectations, I will refund you in full. Just send me an email. No questions asked, no hassle.
Why am I so confident?
Because I know that the moment you see your first image come away from the film and float between your fingers, something wakes up. 35 minutes is more than enough to know whether the magic works for you. And if it doesn't? I would rather refund you than keep you in a workshop that does not serve you.
What the process makes possible

Rediscover the creative gesture
Nothing replaces the joy of feeling an image come away under your fingers. It is no longer about pixels, but about your gesture.
Large format, at last
The emulsion lift gesture, without the limit of the small Polaroid square: A4 (8.3 x 11.7 in), A3 (11.7 x 16.5 in), A3+ (13 x 19 in), and beyond with a wide format printer.

Create the inimitable
Every lift is unique and impossible to reproduce exactly. Your artistic signature becomes obvious.
No time wasted
All the essential information is here, tested and proven. And if you need help, I answer your questions in the private community..
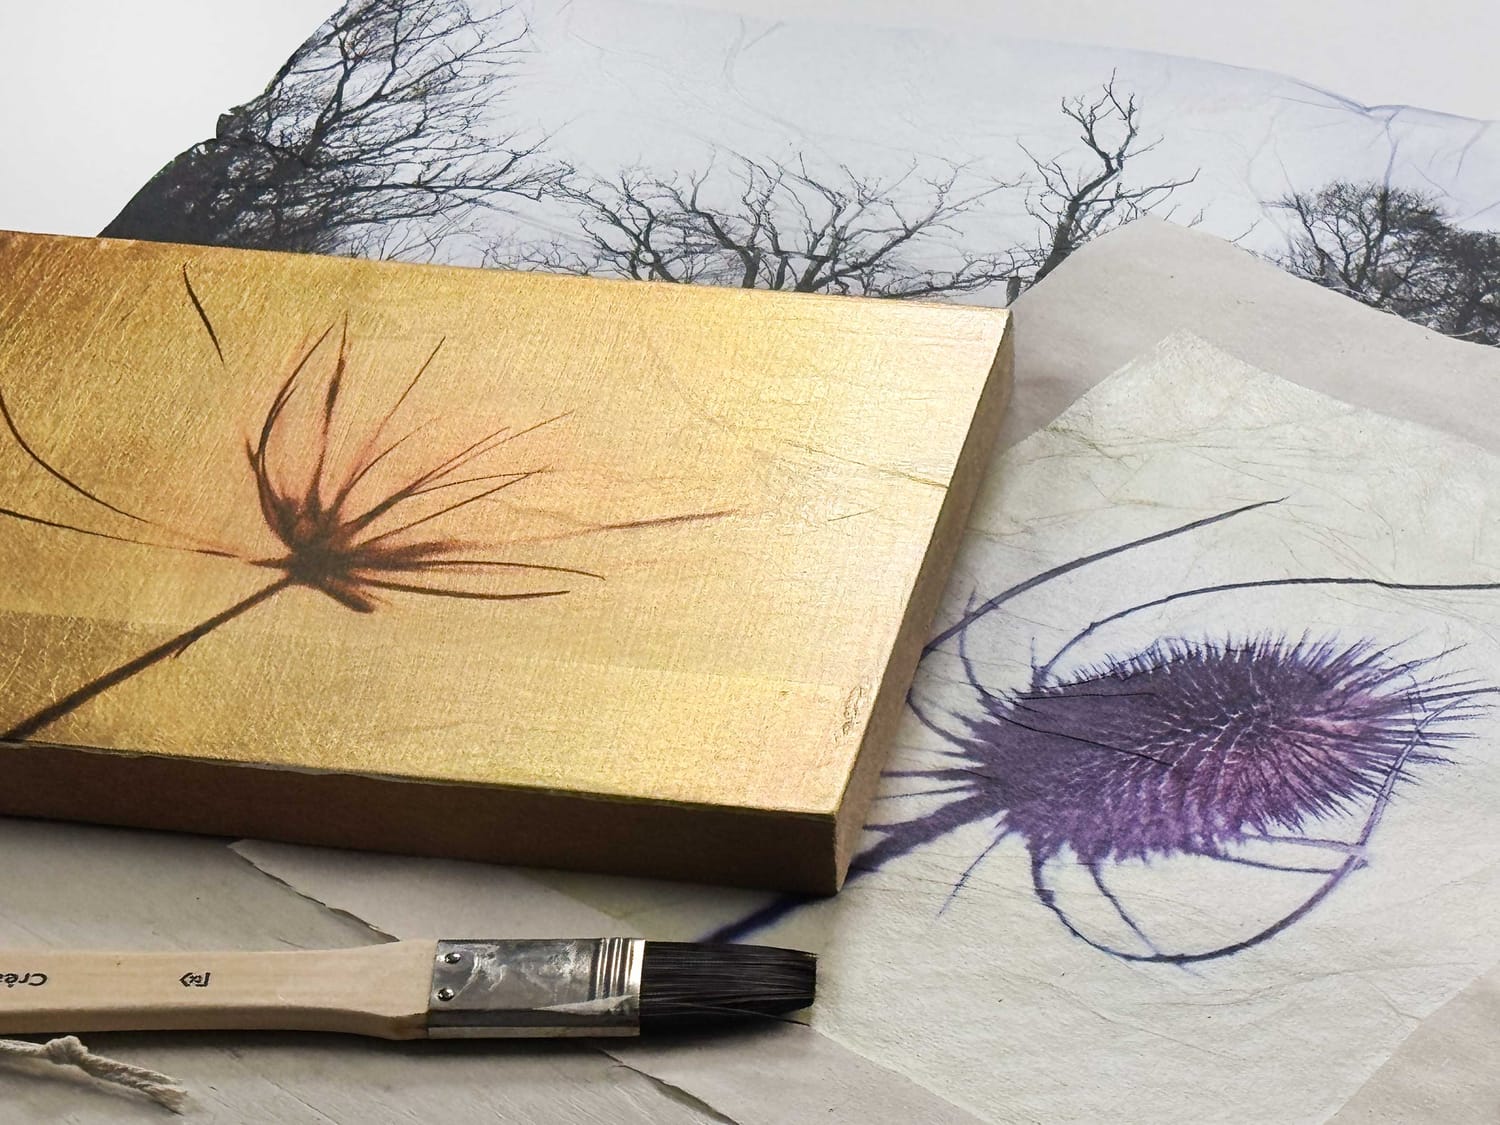
On watercolor paper, on fabric, on gold leaf... it's up to you!
Don't wait any longer,
rediscover the gesture, the material and the unexpected today
Launch Offer
Inkjet Lift
Until November 22
After that, the workshop goes up to 180 €
Full access to the workshop
180 €
140 €
Payment 1 x 140 €
or 2 x 71 €
Who is this workshop for?
Transfer solution, Acrylic Skin, Polaroid emulsion lift…
You already love moving your images from one surface to another.
With Inkjet Lift, you open up a new creative field: the image comes away as a very fine veil, which you crease, tear and layer.
You know the magic of that fragile veil that comes away and creases in water, but you miss it because of the small format, the cost and the rarity of instant film.
With Inkjet Lift, you find the same gesture, from any digital photo, and in any size you like, with the right inkjet transparency films.
You are looking for inspiration to start creating, or to enrich your photographic or artistic practice. Do you feel the call of the material?
With very few technical steps, Inkjet Lift lets your creative energy flow without holding it back: from idea to artwork, the path is short.
This is not for you if...
You are looking for “perfect” images?
Here, you will not get a glossy reproduction like on your computer screen, or like the flawless prints you see in galleries.
Emulsion lift is full of surprises: creases, streaks, tears, transparencies. If digital perfection is enough for you, this is not for you.
You cannot work in a well ventilated space
Both methods use products that require a very well ventilated room or working outdoors, ideally with a mask. If you have sensitive airways, this workshop is not for you.
You only want to “apply a method”
This workshop is not a recipe. Above all, it is a bridge to your gesture, your creative energy, your own unique way of bringing your image to life.
I share the technique and support you in the private community, but what you make of it will carry your own mark.
You don't feel that longing for the creative gesture
If you don't miss the physical contact with the material, if the gesture doesn't matter to you... then maybe you don't need Inkjet Lift.
This workshop is for those who feel that longing to make, to touch, to shape. For those who are not afraid of taking their time.
Your questions... my answers
Yes. Inkjet emulsion lift is a simple technique, and every step is shown in real time, step by step, including the small accidents and how to fix them. The second method is especially good for beginners.
Yes. The videos get straight to the point, and the downloadable guides let you start practising right away. Working with gold, mounting on canvas or making an ultra thin veil open up real paths for research.
For this workshop, you need inkjet transparency films, a few simple products and tools that I present at the start. You will of course need an inkjet printer, ideally a photo printer (although a standard office inkjet printer also works with the Inkjet Lift process).
Every product has been tested to help you avoid buying the wrong things.
Absolutely! You can work with all your own images. Just print them on the right transparency films with your inkjet printer.
The materials list is free to download.
When you join the workshop, you can download the complete list of all the materials used. In this list, I have included links to websites where you can buy them. Depending on where you live, not everything will be available, but I give you the information you need to make the right choices.
The process works with inkjet prints. If you don't have a photo printer, you can start with an office printer. But if you want to exhibit or sell your work, choose a photo printer with pigment inks. No colour profile needed: the workshop focuses on what matters.
If you took the Transparency Transfer Process™ workshop, Inkjet Lift is very different. Here, there is no transfer solution, but a bath in which the image comes away as a free veil, which you then shape and lay onto other surfaces.
The result with decal paper is quite rough. Coming from Polaroid emulsion lift, I need something more elegant. With Inkjet Lift and its two methods, you get a fine, flexible emulsion veil. Also, one of the two methods lets you work in large format, while decal paper is limited in size (usually A4, 8.3 x 11.7 in).
It is the same gesture: an emulsion veil that comes away, floats in water and creases onto another surface. Here, you can use any digital photo, without the limit of the small Polaroid square. A real liberation if you love emulsion lift and feel frustrated by the small size of Polaroids.
I give you links to buy the films I have tested, but unfortunately they are not available everywhere in the world. That is why I also give you guidelines to recognise, among the inkjet transparency films sold near you, the ones most likely to work.
Every participant has lifetime access to the videos, images and downloadable PDFs. You can watch the videos as many times as you like.
17 videos, about 2 hours in total. Watch them at your own pace, as many times as you like.
No. On fabric, emulsion lift is for decorative pieces only: it cannot be washed.
The workshop is filmed in French, with French and English subtitles that I have checked personally. Automatic English dubbing is also available.
What Students Say About My Teaching
Agnès G.
Professional Artist

"Corinne welcomed me into her studio for a half-day of experimentation. It was a fantastic moment of creativity, discovery, and playful exploration of materials and techniques. Corinne was incredibly generous with her time, fully available, and very open in sharing her experience and expertise with the processes. A truly joyful interlude that left me feeling inspired and enthusiastic."
Sophie C.
Professional Photographer
“Thank you for your clear explanations.”
Cathy P.
Professional Photographer
“A lot of clear explanations in the videos, a lot of passion, and very thoughtful support throughout the process. Now I’ll have to be VERY creative, because many people will be using this technique.”
Marie-Gaëlle C.
Art Therapist
“The workshop perfectly met my expectations. I give it 5 stars.”
Carol D.
Professional Photographer
“Thank you so much, Corinne, for this suspended moment I spent in your studio. You share your passion, your knowledge, and your discoveries with such generosity, and it’s truly wonderful.
I learned so much! Thank you.”
Delphine A.
Hobbyist Artist
“Everything is perfect, I love it!
I can’t wait to move on to the other workshops and explore even further. Thank you so much.”
So, are you ready to let
your first images float?
Join the workshop
Launch Offer
Inkjet Lift
Until November 22
Full access to the workshop
180 €
140 €
Payment 1 x 140 €
or 2 x 71 €
About me
I started my career as an artist with my first exhibition in 2006.

Since then, I have regularly exhibited my work in galleries and at contemporary art fairs in France and abroad.
Deeply inspired by the Pictorialist movement, my approach is driven by a constant search for processes that give each of my images a unique character.
So I have always turned to techniques that involve working by hand, as the image becomes a material shaped by the hand.
This is how I create the play of textures and the chiaroscuro that guide the eye to the essence of my figures and landscapes, to their aura, to their inner light.

Artiste Plasticienne
Corinne Héraud EI . Me contacter : corinne@corinne-heraud.com . Mentions légales . CGV . Politique de confidentialité